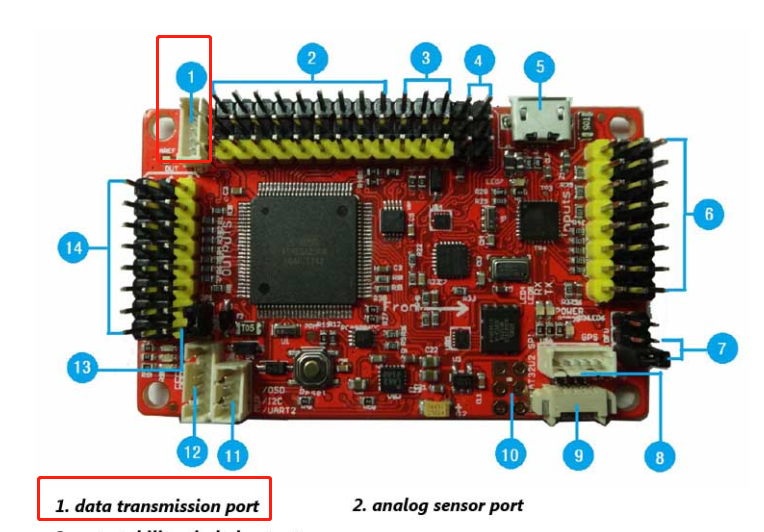
HOW to use wifi V2.0 for APM?
1.use 5pin Line connect to APM flight controller.
2.How to use?
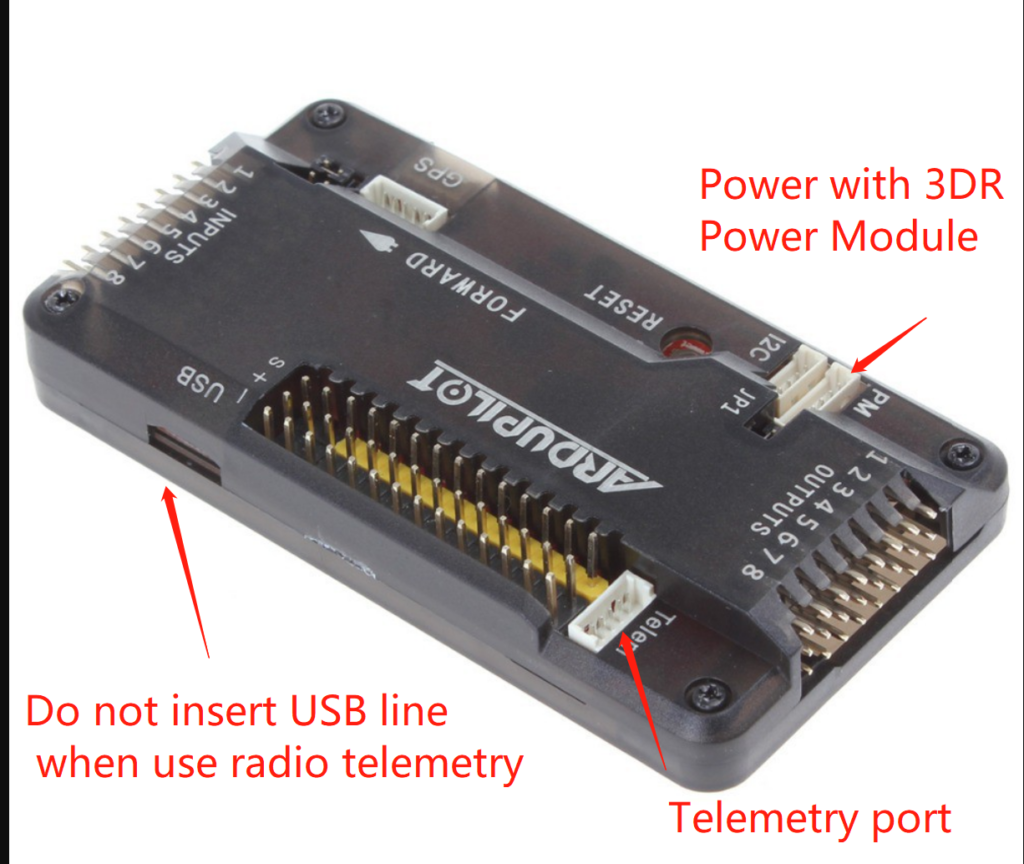
Please note:When using Wifi Radio Telemetry connection, it must use 3DR Power Module or 5V ESC to supply power to the flight control. USB cannot be inserted because USB priority is higher than Radio Telemetry . If USB cable is plugged in, it cannot be used for radio telemetry transmission.
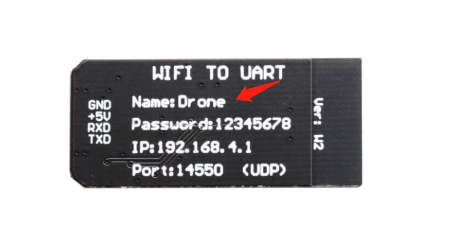
The wifi hotspot name is Drone, so use telephone or computer connect to this hotspot, the password is 12345678.
Note:Some device(For example some iphone IOSsystem) cannot get ip automatically, you should set manual.
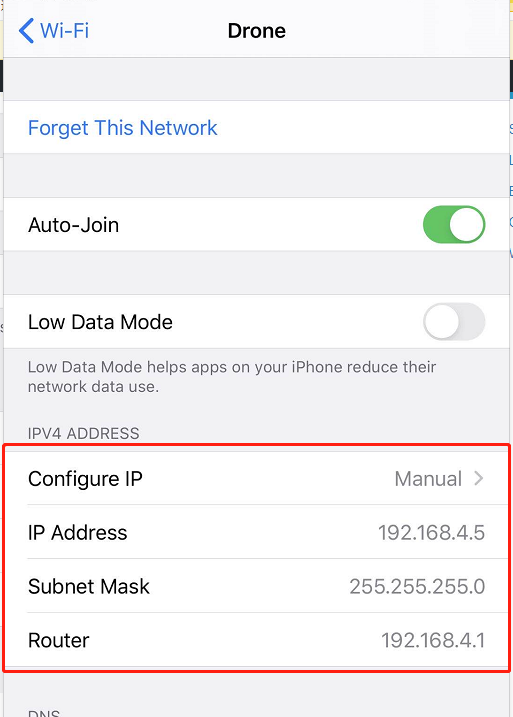
Set the Configure IP as Manual. Set IP address as “192.168.4.5” or other, but can not set as ” 192.168.4.1″,the last number cannot exceed 254.Set Subnet Mask as “255.255.255.0”(should set this value, cannot other). Set Router as “192.168.4.1”( should set this value, cannot other )
When your device connect to this hotspot successfully, you can use browser to vist http://192.168.4.1 , you can modify parameter.
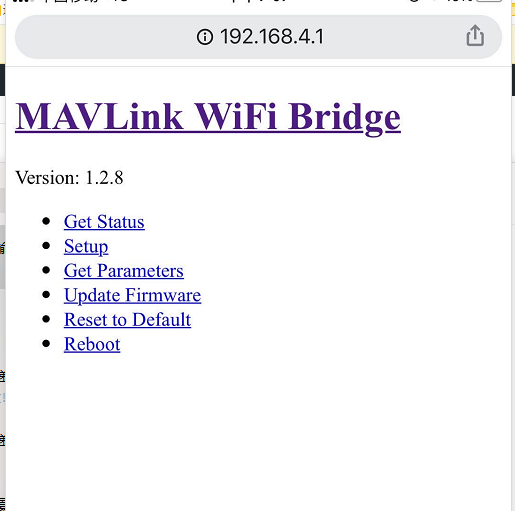
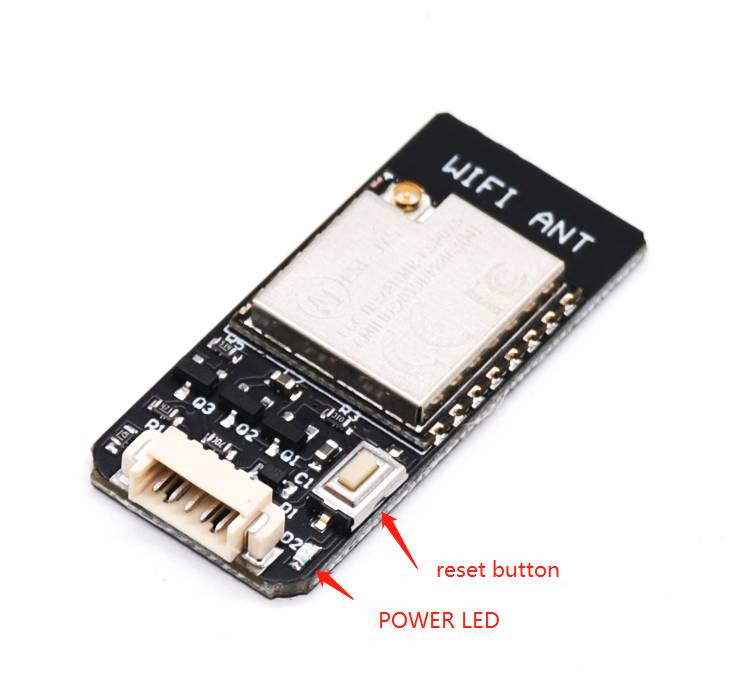
Note, the button is reset button ,not reboot button, when press the button , all the parameter will be set to default if you modify some parameter .
Power LED: when power up, the red LED is on.
Connect LED: when connect with ground control(For example, Mission Planner or Qgroundcontrol) successfully,the redLED is flahing. when disconnect with ground control ,the red LED is on.
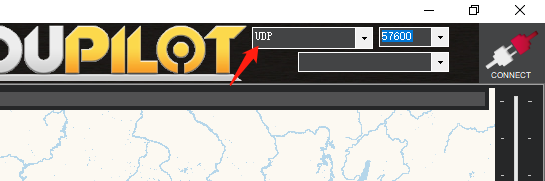
1.How to use for Mission planner ?
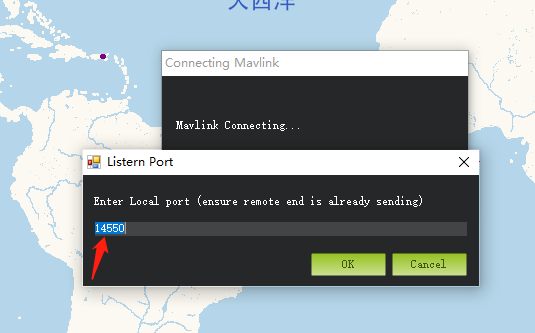
Firstly, connect your PC to hotspot Drone successfully. Select UDP. Then click “Connect” button ,use 14550 port. Click “Ok”.There is no need to choose the baud rate. The default baud rate of the wifi module is 57600. But 115200 or other can also work.
2.How to use for Telephone
For Android:
Download DroidPlanner from here,https://github.com/DroidPlanner/Tower/releases
DroidPlanner should choose “UDP” and “14550” port before connecting to groundcontrol.