Power Monitor/Module Configuration in Mission Planner
Forwarded from here
A power monitor can be used to measure the battery voltage and current for use in the battery failsafe and a power module can also provide a stable power supply to the autopilot.
ArduPilot is compatible with a number of power modules/monitors.
Note
Boards with integrated power monitors have their parameters setup by default.
Mission Planner Setup
Battery measurement is primarily set up in the Mission Planner’s INITIAL SETUP | Optional Hardware | Battery Monitor screen. Note that currently Mission Planner only supports the first two Battery Monitors in the system (a total of 10 are available in firmware versions 4.0 and later). More would need to be configured directly by directly setting their parameters in the CONFIG/TUNNING|Full Parameter List screen.
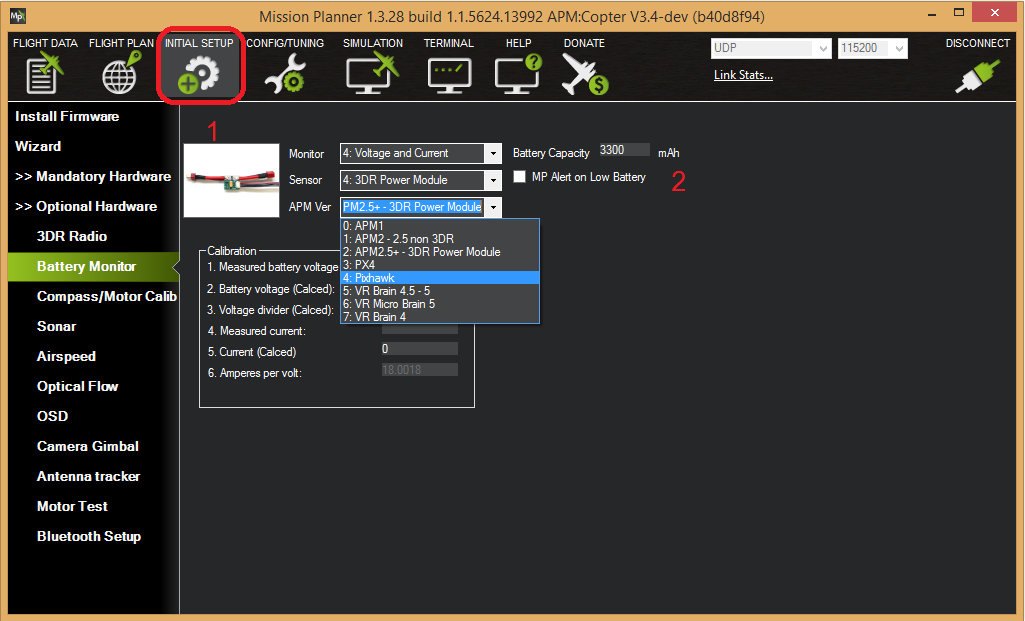
MissionPlanner: Battery Monitor Configuration
Enable voltage and current sensing
Enter the properties your monitor can measure, the type of monitor, the type of autopilot, and the battery capacity:
- Monitor: Voltage and Current or Battery Volts
- Sensor: Supported power module, or “Other”
- APM ver: Autopilot (e.g. Pixhawk )
- Battery Capacity: Battery capacity in mAh
The Sensor selection list offers a number of Power Modules (including popular models from 3DR and AttoPilot) which you can select to automatically configure your module. If your PM is not on the list then you can select Other, enter its recommended values, or perform a manual calibration as described below.
Calibration
The bottom section of the the Battery Monitor screen allows you to calibrate the voltage/current measurement in order to verify that the measured voltage of the battery is correct. You can also set the Sensor selection list to Other and use the calibration process to configure an “unknown” power monitor/module.
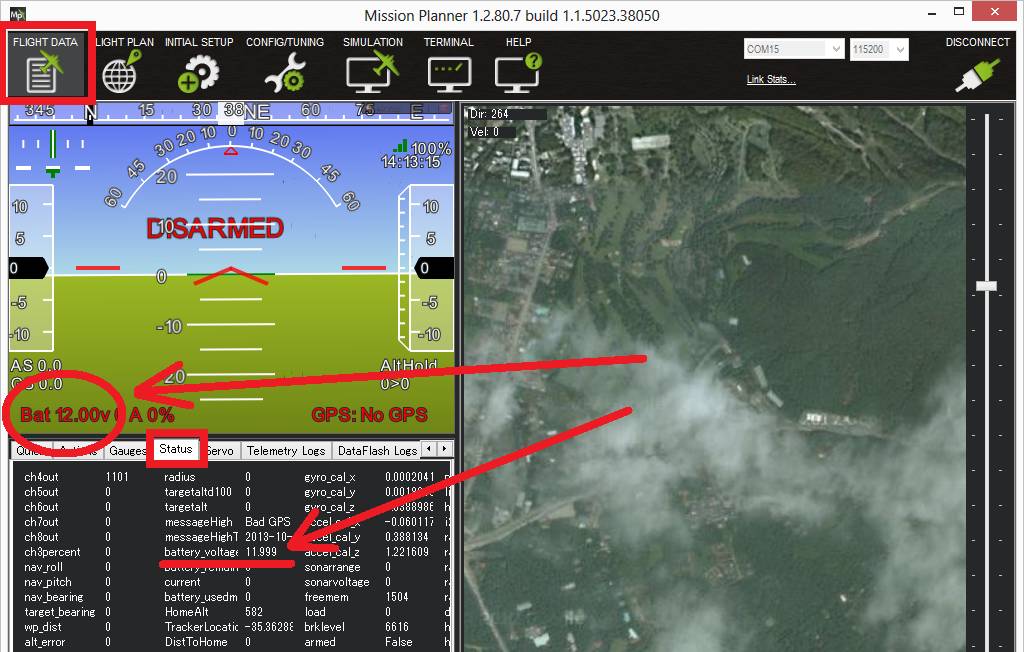
To calibrate the voltage reading:
- Check the voltage of your LiPo battery with a hand-held volt meter or a power analyzer
- Connect your Pixhawk-series to your computer and plug in the LiPo battery
- Check the voltage through the Mission Planner’s INITIAL SETUP | Optional Hardware | Battery Monitor screen or on the Flight Data screen’s HUD or Status tab.
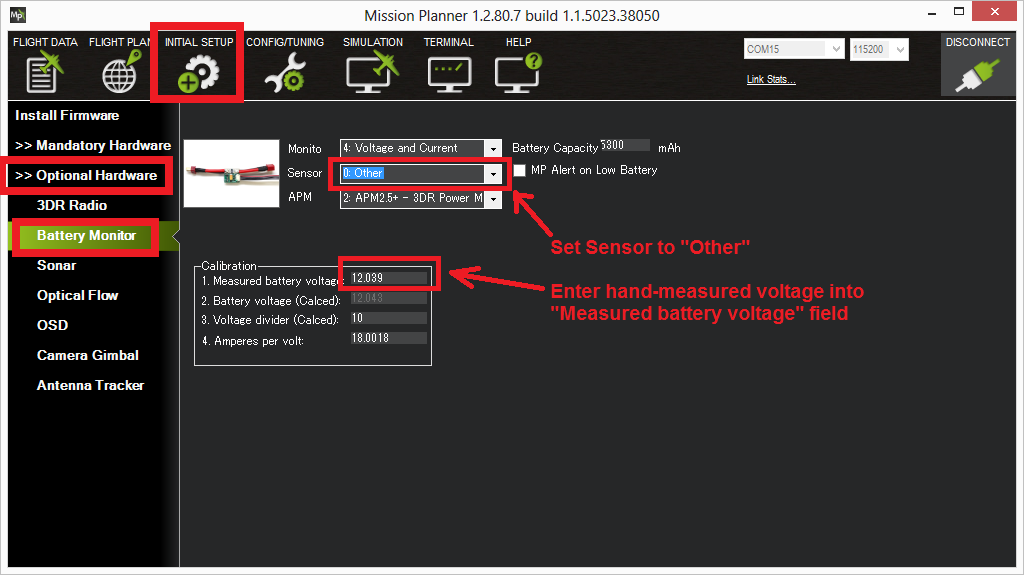
If you find the voltage is not correct (i.e. if off from the hand-held volt meter’s reading by more than perhaps 0.2V) you can calibrate it by doing the following:
- On Mission Planner’s INITIAL SETUP | Optional Hardware | Battery Monitor screen set the “Sensor” to “Other”.
- Enter the voltage according to the hand-held volt meter in the “Measured Battery Voltage” field
- Press tab or click out of the field and the “Voltage Divider (Calced)” value will update and the “Battery voltage (Calced)” should now equal the measured voltage
Using the power analyser you can also measure the current and compare to results displayed in the Mission Planner.
Note
Most current sensors are not very accurate at low currents (less than 3 Amps). Typically you should perform current calibration at around 10A. The exception is PMs that use hall-effect sensors, like those from Mauch.