How to use WIFI V3.0?
The ESP32 are readily available Wi-Fi modules with full TCP/IP stack and microcontroller capability. DroneBridge for ESP32 offers a transparent and bi-directional serial to WiFi bridge.
Typical WiFi range is ~50m-200m depending on the antennas. High gain directional antennas (5db) would offer even more range.
WIFI V3.0 use 32 bit CPU .It runs faster and supports TCP / UDP. Convenient interface for parameter setting.
Since WiFi V3.0 uses mavlink v2.0 protocol, it only supports pixhawk flight control, not APM flight control. If you need to support APM flight control, please use WiFi v1.0 or v2.0.
1.How to connect?
use 6P line connects to pixhawk flight controller.
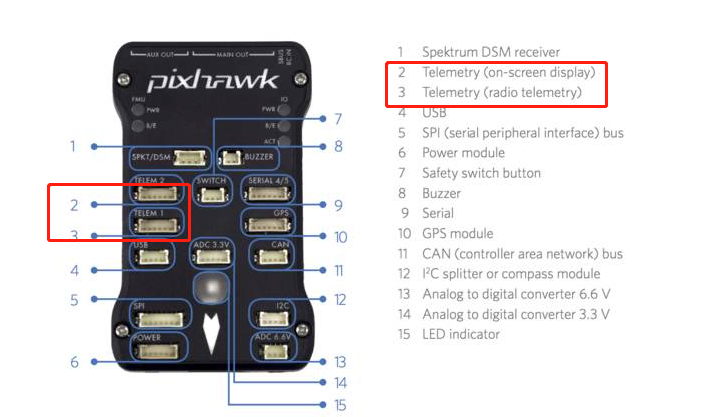
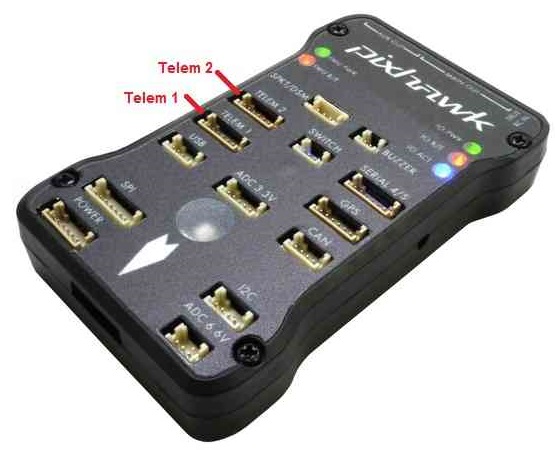
Due to the different firmware, some firmware, two ports can be used, some firmware can only use one of the ports. So find one of the available ports for the connection.
IF you use PX4 firmware ,only TELEM1 can be used ,can not use TELEM2.
For Ardupilot firmware , It is recommended to use the TELEM2 port. Or find one of the available ports for the connection.
For PX4 firmware , should use TELEM1 port.
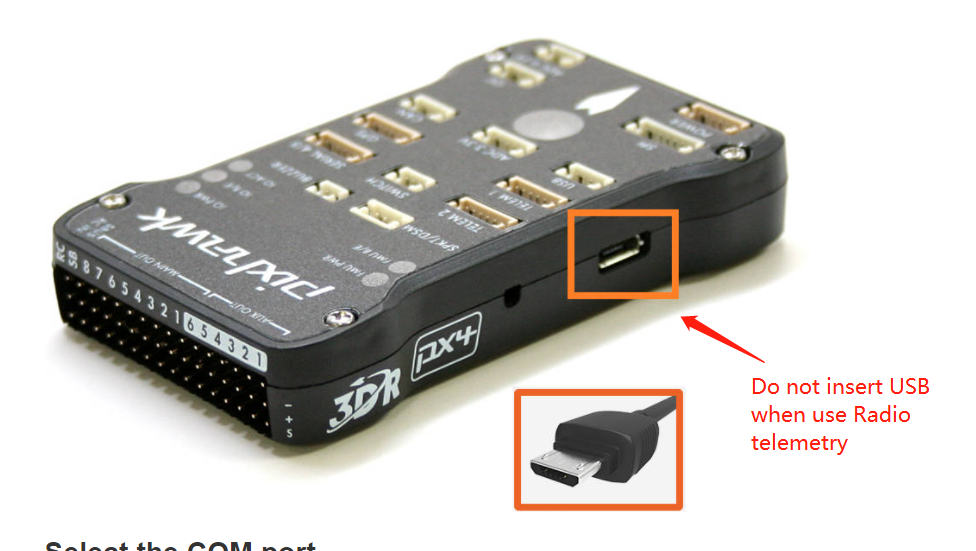
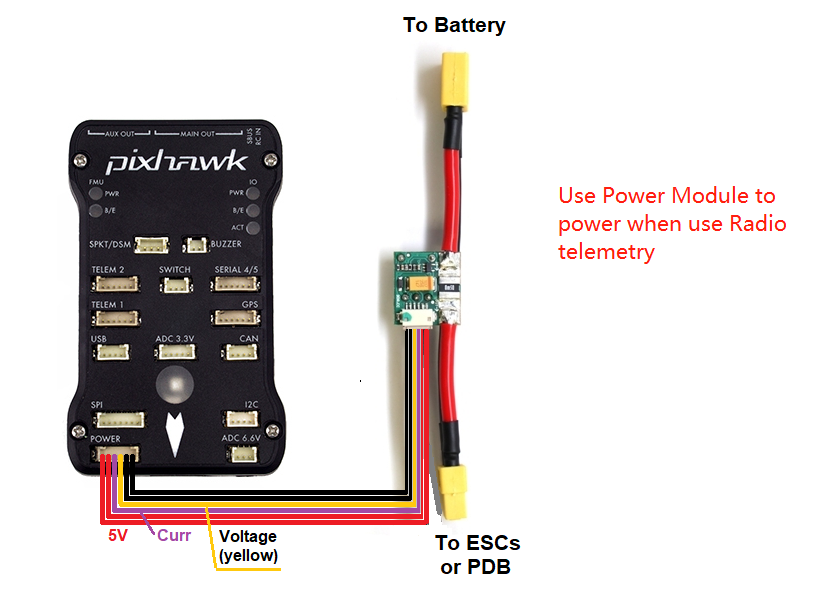
2.How to use?
Please note:When using Wifi Radio Telemetry connection, it must use 3DR Power Module or 5V ESC to supply power to the flight control. USB cannot be inserted because USB priority is higher than Radio Telemetry . If USB cable is plugged in, it cannot be used for radio telemetry transmission.
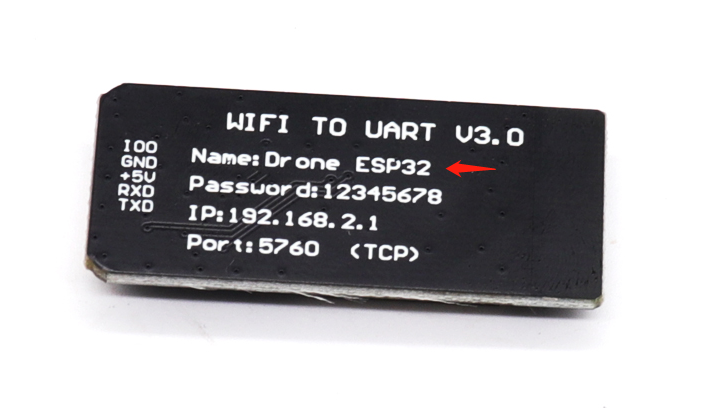
The wifi hotspot name is Drone ESP32 , so use telephone or computer connect to this hotspot, the password is 12345678.
Note:Some device(For example some iphone IOSsystem) cannot get ip automatically, you should set manual.
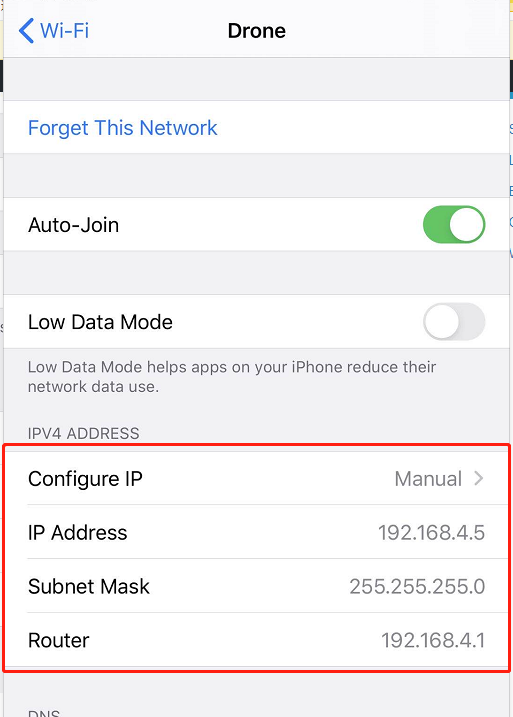
Set the Configure IP as Manual. Set IP address as “192.168.2.5” or other, but can not set as ” 192.168.2.1″,the last number cannot exceed 254.Set Subnet Mask as “255.255.255.0”(should set this value, cannot other). Set Router as “192.168.2.1”( default , if you modify this value,please use the value you modify )
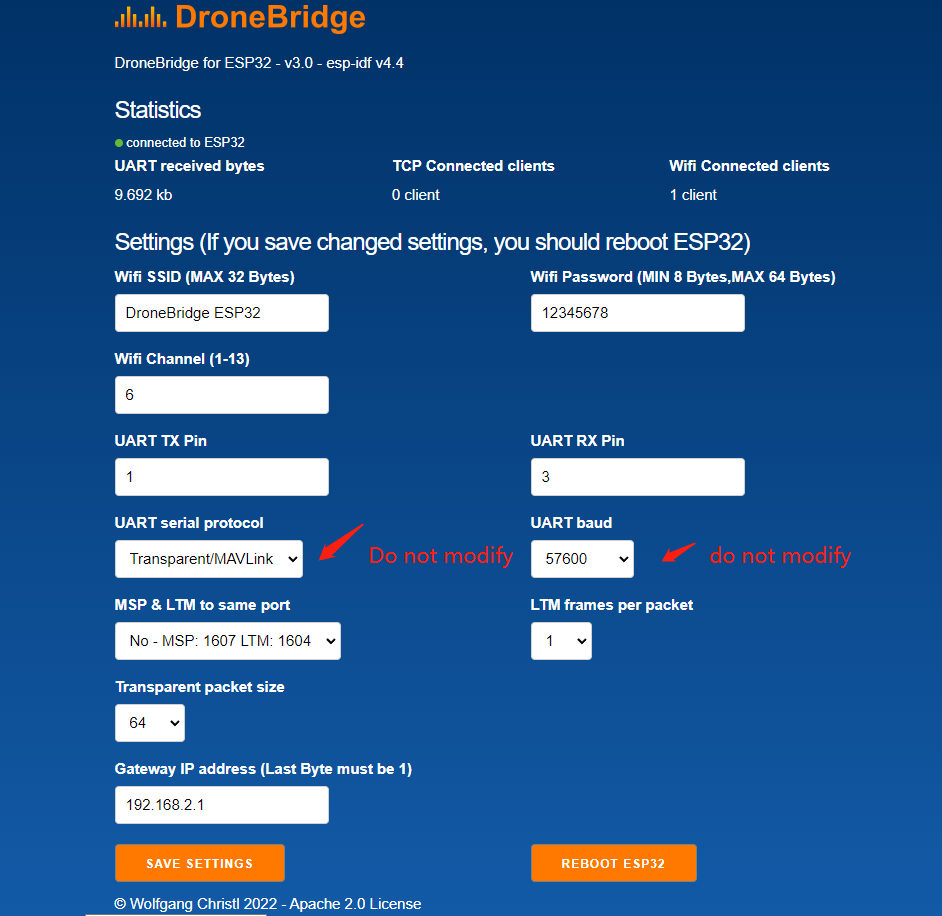
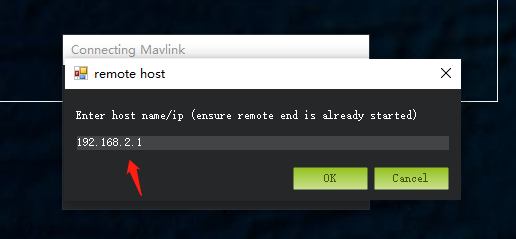
When your device connect to this hotspot successfully, you can use browser to vist http://192.168.2.1 , you can modify parameter.
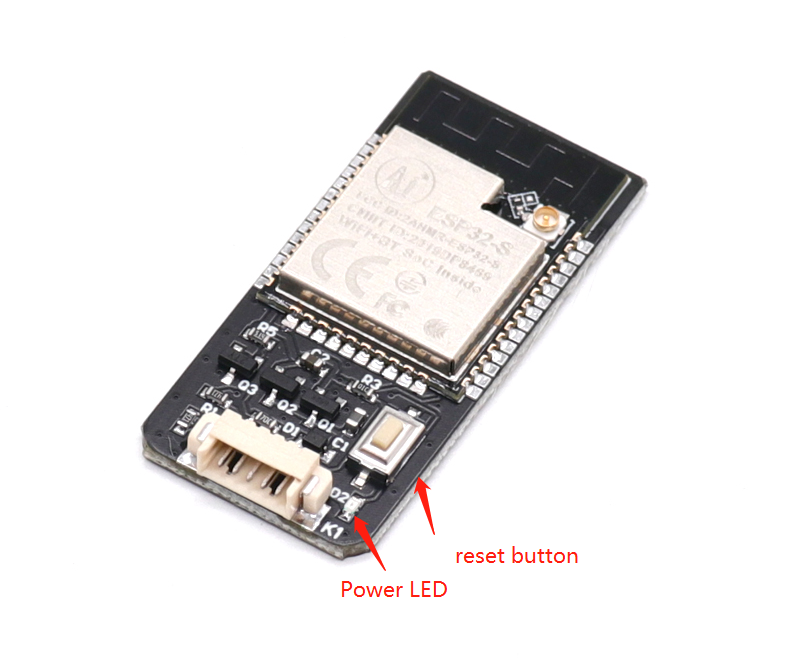
Note, the button is reset button ,not reboot button, when press the button , all the parameter will be set to default if you modify some parameter .
Power LED: when power up, the red LED is on.
Connect LED: when connect with ground control(For example, Mission Planner or Qgroundcontrol) successfully,the RED LED is flahing. when disconnect with ground control ,the REDLED is on.
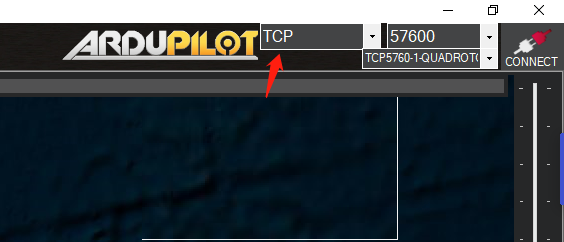
1.How to use for Mission planner ?
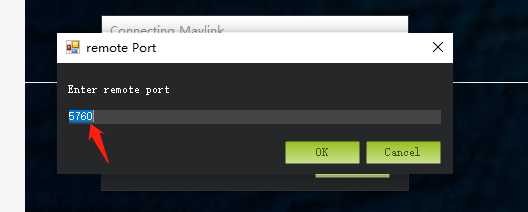
Firstly, connect your PC to hotspot Drone ESP32 successfully. Select TCP. Then click “Connect” button ,use 5760 port. Click “Ok”.There is no need to choose the baud rate. The default baud rate of the wifi module is 57600. But 115200 or other can also work.
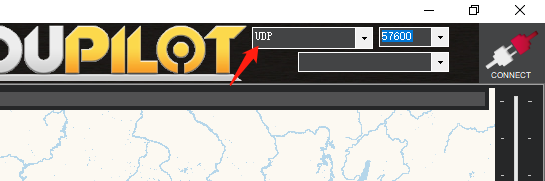
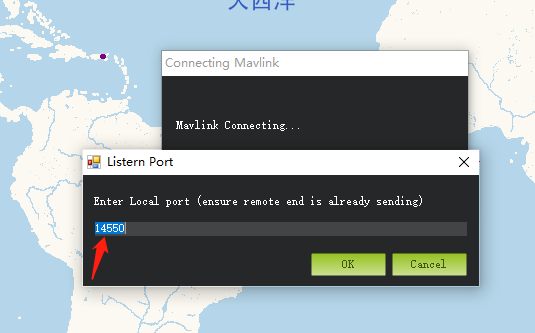
WIFI V3.0 supports UDP and TCP, also you can use UDP.
Firstly, connect your PC to hotspot Drone successfully. Select UDP. Then click “Connect” button ,use 14550 port. Click “Ok”.There is no need to choose the baud rate. The default baud rate of the wifi module is 57600. But 115200 or other can also work.
2.How to use for Telephone
For Android: Download qgroundcontrol from here,http://qgroundcontrol.com/downloads/
Download DroidPlanner from here,https://github.com/DroidPlanner/Tower/releases
For iphone(IOS): Search qgroundcontrol on app store.
qgroundcontrol can connect automatically, DroidPlanner should choose “UDP” and “14550” port before connecting to groundcontrol.